The makeup look that I've created today is very easy, but that's not it! It's also very affordable because I've decided to use ONLY drugstore products. I did my first youtube video for this tutorial because I thought it would be easier to follow this tutorial :) By the way, I know that my skin is not perfect and I don't think anyone is, plus my hair looks like crap but hey I'm human too ;) xox

Showing posts with label Tutorial. Show all posts
Showing posts with label Tutorial. Show all posts
Wednesday, July 30, 2014
Back-To-School | High School Makeup Look - All Drugstore + FIRST VIDEO ON YOUTUBE
Heyy girls,
The makeup look that I've created today is very easy, but that's not it! It's also very affordable because I've decided to use ONLY drugstore products. I did my first youtube video for this tutorial because I thought it would be easier to follow this tutorial :) By the way, I know that my skin is not perfect and I don't think anyone is, plus my hair looks like crap but hey I'm human too ;) xox
The makeup look that I've created today is very easy, but that's not it! It's also very affordable because I've decided to use ONLY drugstore products. I did my first youtube video for this tutorial because I thought it would be easier to follow this tutorial :) By the way, I know that my skin is not perfect and I don't think anyone is, plus my hair looks like crap but hey I'm human too ;) xox
Saturday, February 8, 2014
♡ Eye Makeup Look Tutorial | Valentine's Day ♡
Heyy girls,
** Sometimes I look like I'm not wearing any eyeshadow, but it is because my camera doesn't have the best picture quality **


3- Then take the same brush and put the color Burnout all over the lid.


I was looking through my blog posts recently and I realized that I've never done a tutorial with the Urban Decay Naked 3 palette. But I did an entire post with swatches of this palette if you're interested. Anyway, here I am today with this Valentine's Day eye makeup look. So, grab your Naked 3 palette and let's get started with this tutorial.
** Sometimes I look like I'm not wearing any eyeshadow, but it is because my camera doesn't have the best picture quality **
1- Apply an eyeshadow primer all over the lid. I used the Urban Decay Primer Potion.
2- Take a flat eyeshadow brush and put Strange all over the lid as a base color.
3- Then take the same brush and put the color Burnout all over the lid.
4- Take a big fluffy brush and put the color Limit in the crease. Do a circular motion on the outside of the crease for more definition.
5- Take the same brush and put a darker color called Factory on the outside part of the crease.
6- Take the same color of the beginning, Strange, and highlight the inner corners of your eyes.
Friday, July 5, 2013
Makeup look with Boho cosmetics + review
heyy girls,
a couple of weeks ago Boho Cosmetics, which is an ecological makeup brand, sent me some products that I chose from their website. I had time to really test them out and I am here today to give you my honest opinion about those products.
I thought also that I could recreate my "go-to makeup look" and an easy hairstyle to show you what it looks like. Basically, the tutorial that I am going to show you is what I would wear if I have 5-10 minutes before I absolutely have to leave the house to go somewhere.

Look
1) Apply your favorite BB cream or CC cream of the moment. I am using the Maybelline Dream Fresh BB cream in Light. I did a review of this product here.

2) Apply some under eye concealer under your eyes to erase those dark circles.

3) Use a big powder brush and apply some powder to set the makeup in place.

4) Take a blush brush and apply a nice soft pink blush on your cheeks.

5) Use your favorite liquid liner and apply a thin line on your upper lash line.
**Tips & tricks: Put a little bit of eyeshadow primer along your upper lash line before applying the liquid liner. That way, it will help the liner stays on longer especially if yours isn't waterproof.
a couple of weeks ago Boho Cosmetics, which is an ecological makeup brand, sent me some products that I chose from their website. I had time to really test them out and I am here today to give you my honest opinion about those products.
I thought also that I could recreate my "go-to makeup look" and an easy hairstyle to show you what it looks like. Basically, the tutorial that I am going to show you is what I would wear if I have 5-10 minutes before I absolutely have to leave the house to go somewhere.
Look
1) Apply your favorite BB cream or CC cream of the moment. I am using the Maybelline Dream Fresh BB cream in Light. I did a review of this product here.
2) Apply some under eye concealer under your eyes to erase those dark circles.
3) Use a big powder brush and apply some powder to set the makeup in place.
4) Take a blush brush and apply a nice soft pink blush on your cheeks.
5) Use your favorite liquid liner and apply a thin line on your upper lash line.
**Tips & tricks: Put a little bit of eyeshadow primer along your upper lash line before applying the liquid liner. That way, it will help the liner stays on longer especially if yours isn't waterproof.
Tuesday, June 11, 2013
Chanel Rouge Coco Shine's commercial inspired look
heyy girls,
so this post was requested and I thought it was a great idea to recreate the look of the model on the Chanel Rouge Coco Shine commercial...so here it is... ;) **since I don't have an amazing and expensive camera, the look seems less intense and less "shimmery" than what it really is**
 As you can see on the pictures, this look is very natural and perfect when you want to wear a pop of color on the lips or on the cheeks since it isn't heavy. Here is the link to the commercial... https://www.youtube.com/watch?v=NHqS4dVCJJ0


so this post was requested and I thought it was a great idea to recreate the look of the model on the Chanel Rouge Coco Shine commercial...so here it is... ;) **since I don't have an amazing and expensive camera, the look seems less intense and less "shimmery" than what it really is**
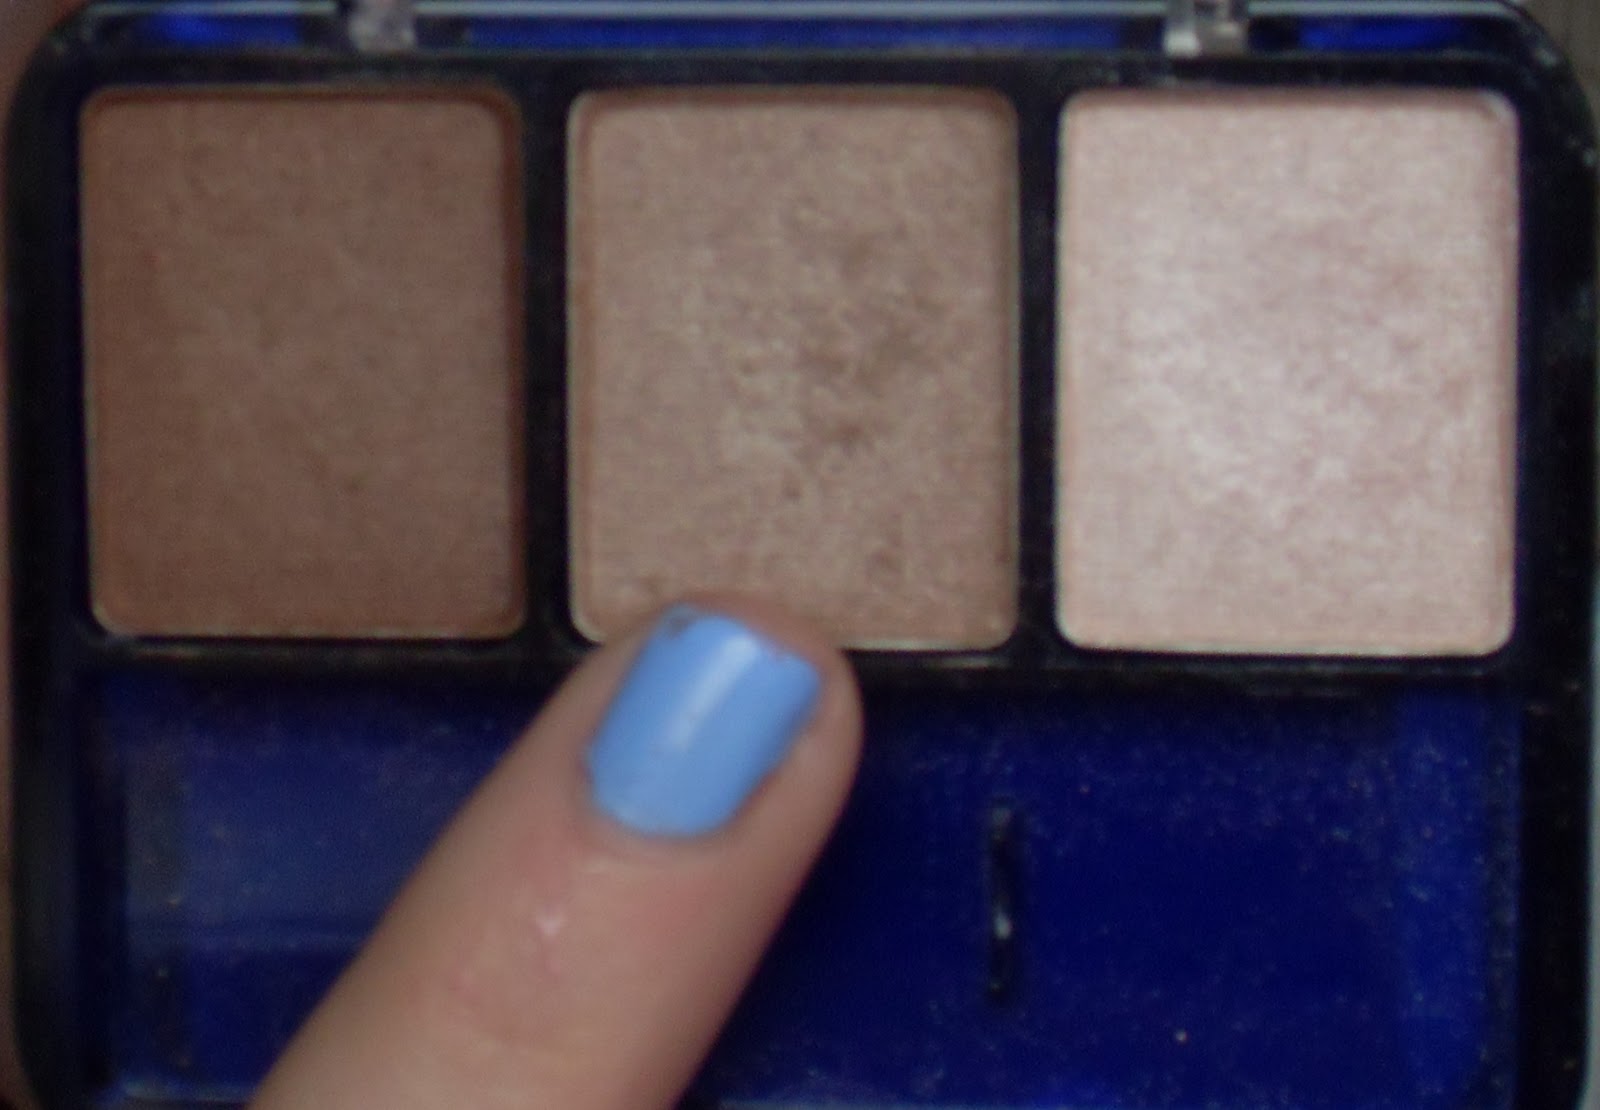
1) Apply an eye primer
2) Apply the middle color on the Covergirl Shimmering Sand trio all over the lid.
3) Apply the color Naked 2 in the Naked Basics palette in the crease.
Saturday, April 13, 2013
Spring inspired makeup tutorial + I need your help!
heyy girls,
since Spring is coming up I've decided to do a makeup inspired by that time of year. For me Spring means pastel colors, softness, natural, fresh... So today I'll show you how to realize a very soft and girly eye look. Let me tell you that I will be rocking this look in the next weeks ;) I also included a lip combo that is perfect for Spring AND my floral nail print that I just instagram about it...
Today I'll be using the Naked Basics palette (review) and the Naked palette (review). So here is the look...


Here is a step by step tutorial to learn how to recreate this look...
1) Prime your eyes with a primer. I used Urban Decay Primer Potion.

2) I took the color W.O.S. from the Naked Basics and I put it all over my eye.

since Spring is coming up I've decided to do a makeup inspired by that time of year. For me Spring means pastel colors, softness, natural, fresh... So today I'll show you how to realize a very soft and girly eye look. Let me tell you that I will be rocking this look in the next weeks ;) I also included a lip combo that is perfect for Spring AND my floral nail print that I just instagram about it...
Today I'll be using the Naked Basics palette (review) and the Naked palette (review). So here is the look...
Here is a step by step tutorial to learn how to recreate this look...
1) Prime your eyes with a primer. I used Urban Decay Primer Potion.
2) I took the color W.O.S. from the Naked Basics and I put it all over my eye.
Friday, January 4, 2013
My everyday eye makeup tutorial
Heyy girls,
For me, school begins in a couple of days. So I've decided to do my everyday eye makeup for you guys. I do this look everyday before school. It is pretty simple but I really like it that way. It is also very natural looking which I think is appropriated for school. I don't prime my eyes in that look because the product that I use doesn't crease or wear off during the day.


Products that I used:
- Maybelline Color Tattoo in Barely Beige
- Covergirl eyeshadow trio in Shimmering Sand (the lightest color)
- ELF eyelash curler
- Maybelline The Rocket mascara
Steps:
1- Apply Maybelline Color Tattoo in Barely Beige all over the lid. You can apply it with your finger but I prefer using a brush. I have a review of that product on my blog.

For me, school begins in a couple of days. So I've decided to do my everyday eye makeup for you guys. I do this look everyday before school. It is pretty simple but I really like it that way. It is also very natural looking which I think is appropriated for school. I don't prime my eyes in that look because the product that I use doesn't crease or wear off during the day.
Products that I used:
- Maybelline Color Tattoo in Barely Beige
- Covergirl eyeshadow trio in Shimmering Sand (the lightest color)
- ELF eyelash curler
- Maybelline The Rocket mascara
Steps:
1- Apply Maybelline Color Tattoo in Barely Beige all over the lid. You can apply it with your finger but I prefer using a brush. I have a review of that product on my blog.
Subscribe to:
Posts (Atom)